Verification Groups
Verification Groups are a powerful feature that allows you to organize and manage multiple verification processes for a single customer or entity. This feature replaces the previous identities system and provides more flexibility and control over your verification workflows.
What are Verification Groups?
Verification Groups are logical containers that group related verification processes together. Instead of managing individual verification requests separately, you can now:
- Group Multiple Verifications: Combine different types of verifications (e.g., NIN, BVN, CAC, Liveness Check) into a single group
- Track Progress: Monitor the status of all verifications within a group
- Manage Approvals: Control how verifications are approved and by whom
- Organize by Use Case: Create groups for different business scenarios (e.g., onboarding, compliance, background checks)
Key Benefits
- Simplified Management: Handle multiple verifications as a single unit
- Flexible Approval Workflows: Choose between automatic AI approval or manual admin review
- Better Organization: Group verifications by customer, project, or business process
- Enhanced Tracking: Monitor progress across all verifications in a group
Organization Setup
Who Can Configure Verification Groups?
Organization owners have the ability to set up and configure verification groups for their organization. This includes:
- Creating verification group templates
- Configuring approval workflows
- Setting up admin roles and permissions
- Defining verification requirements
Step-by-Step Configuration Process
Follow these steps to set up verification groups in your organization:
Step 1: Access Verification Groups Settings
- Sign into the Dashboard: Organisation owners need to sign into the SourceID dashboard
- Navigate to Settings: Go to the settings tab in the dashboard
- Locate Verification Groups: You'll see a dedicated "Verification Groups" tab in the settings
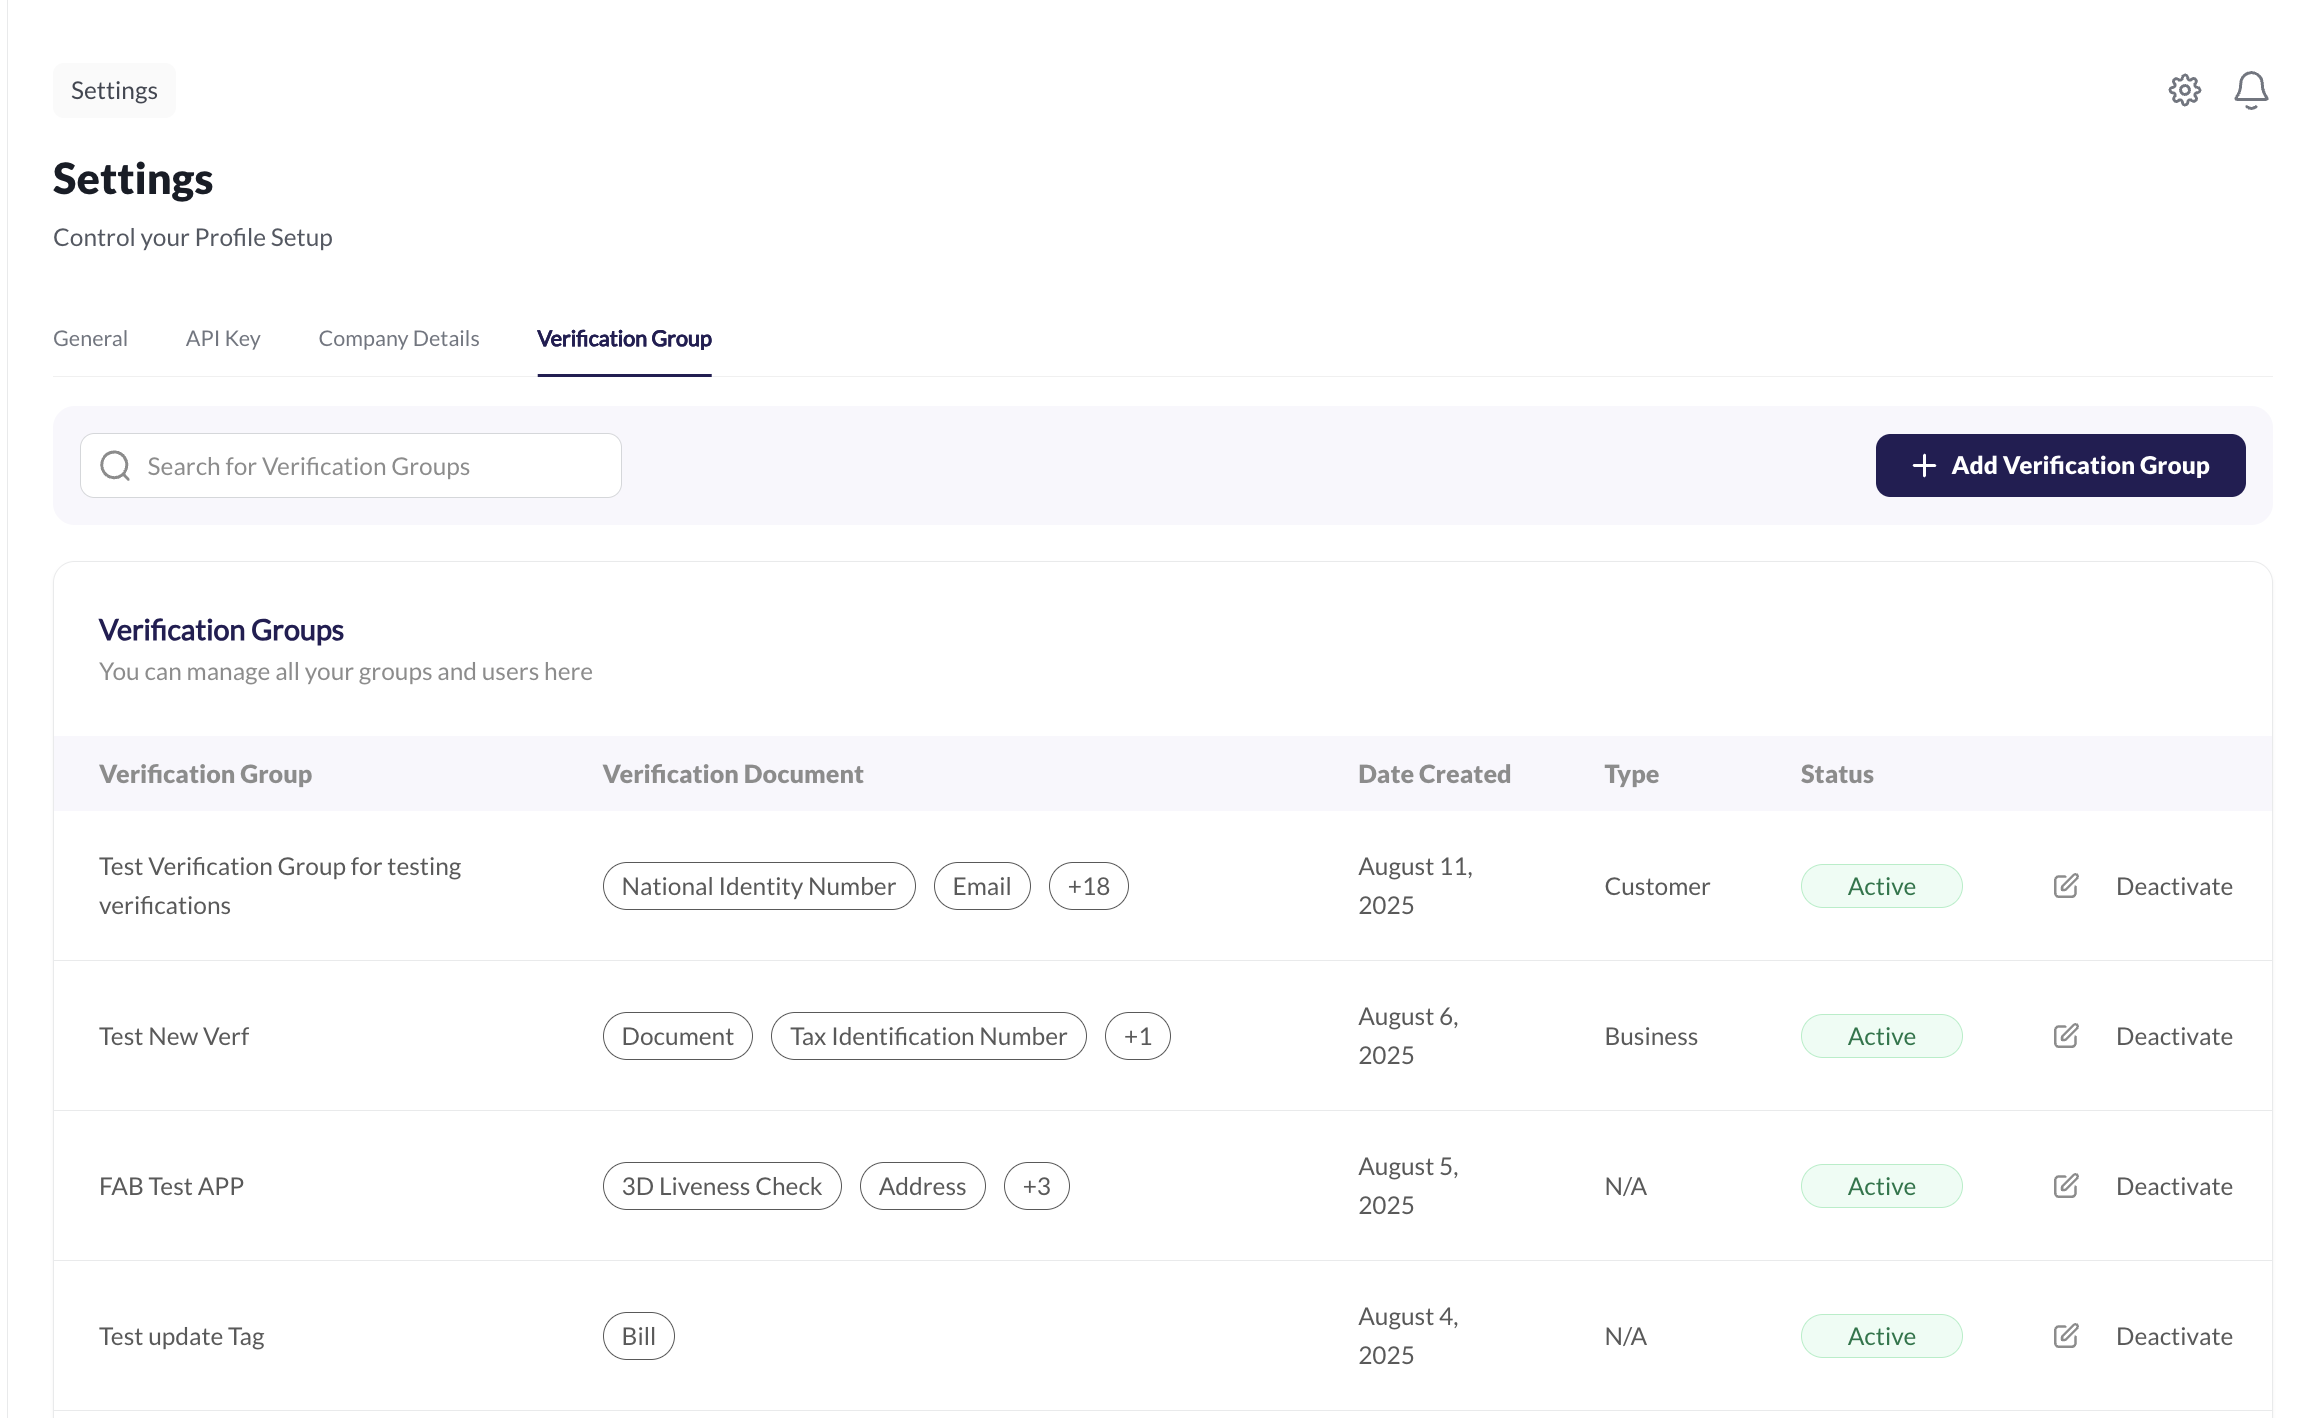
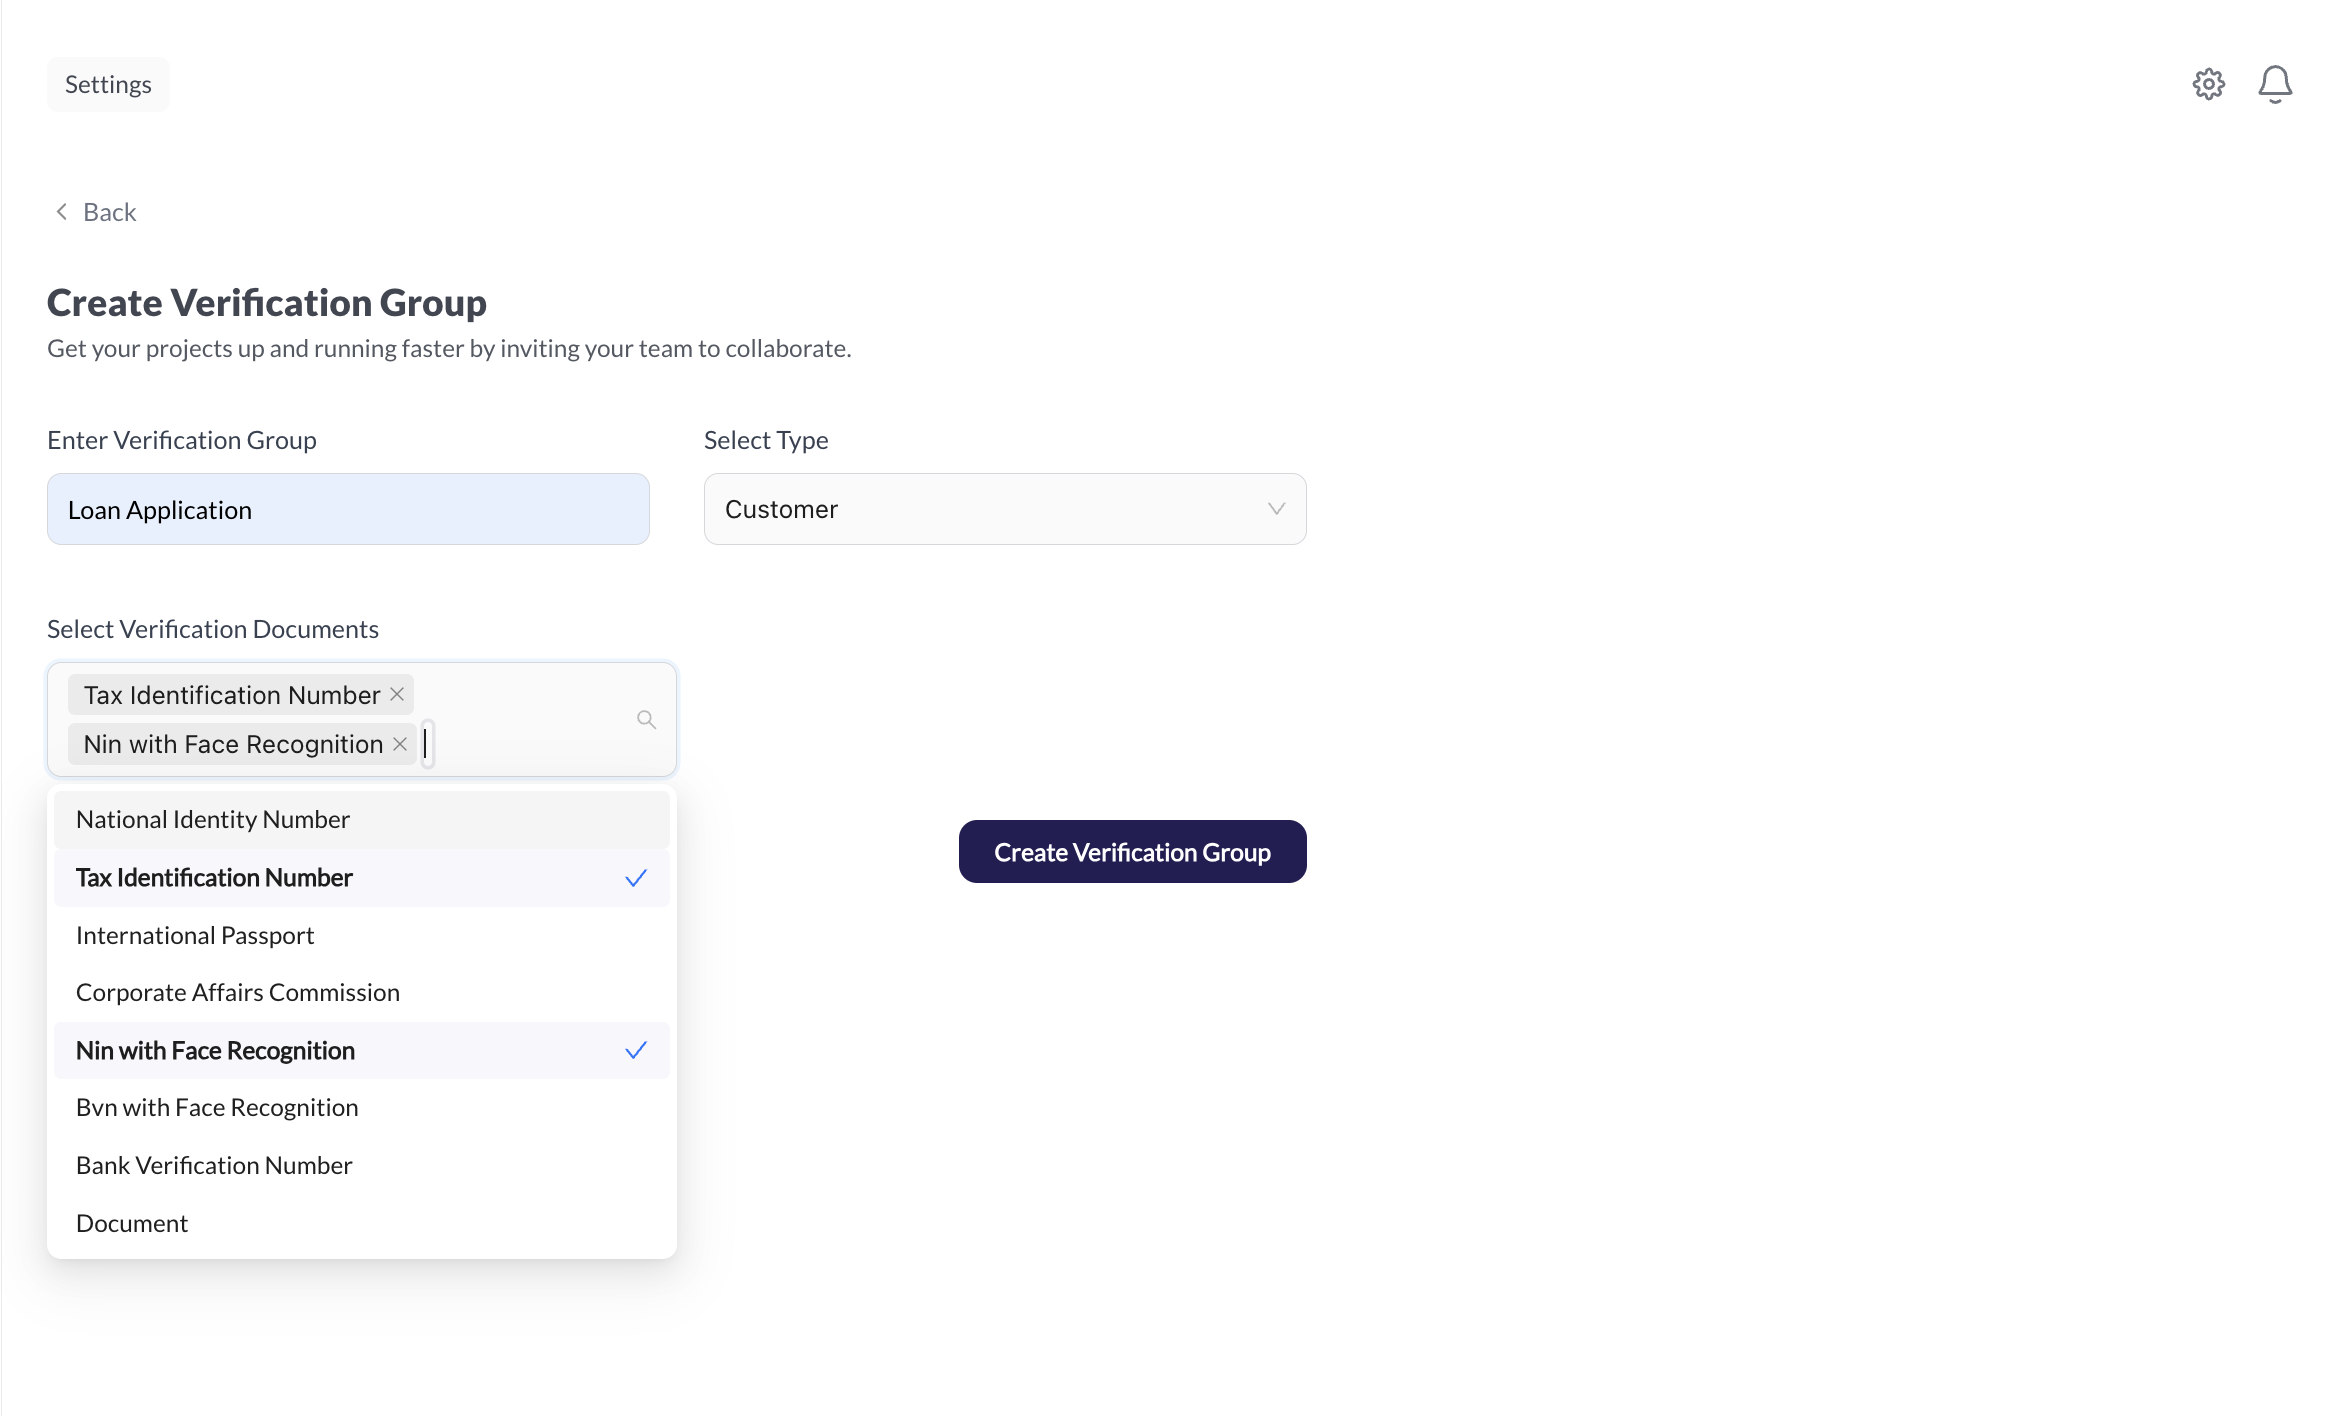
Step 2: Create a New Verification Group
- Click "Add Verification Group": Press the button to create a new verification group
- Enter Group Details:
- Group Name: Provide a descriptive name for your verification group
- Type: Select either "Customer" or "Business" based on your use case
- Verification Documents: Choose which verification documents to include in this group
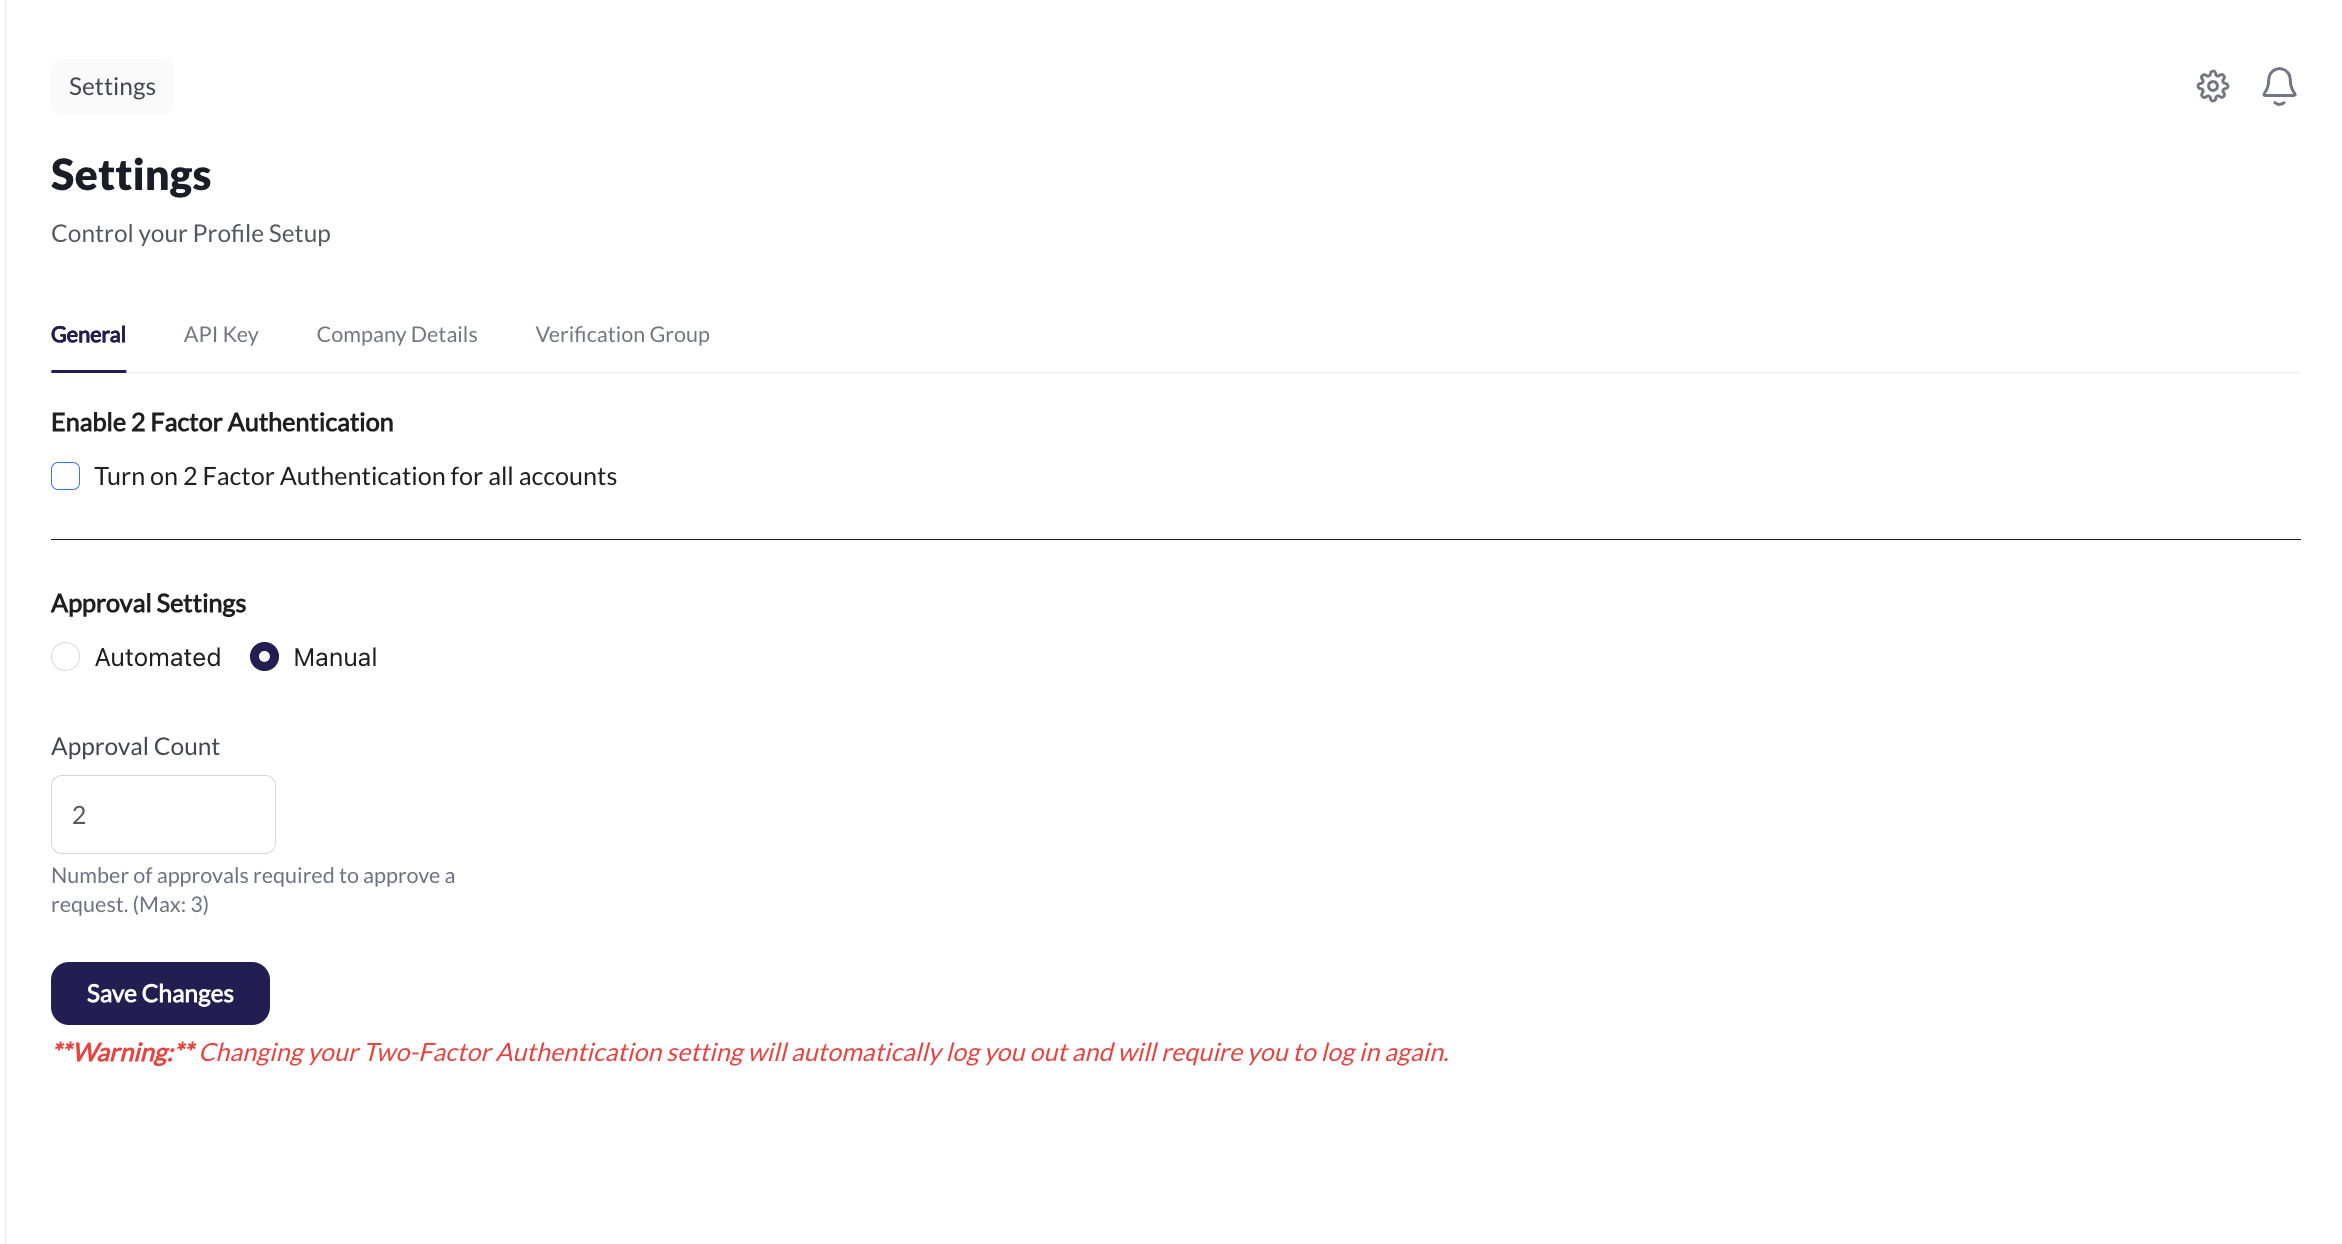
Step 3: Configure Approval Settings
- Navigate to General Settings: Go to the "General" tab in the settings page
- Select Approval Process:
- Automated: Choose automatic AI approval for faster processing
- Manual: Select manual approval for higher security and control
- Configure Approval Count: Set the number of admins required to approve documents (maximum of 3)
Configuration Options
When setting up verification groups, organization owners can configure several key aspects:
1. Approval Workflow
You can choose between two approval modes:
Automatic AI Approval - Verifications are automatically approved by AI when they meet confidence thresholds - Faster processing and reduced manual intervention - Suitable for high-volume, low-risk scenarios
Manual Admin Approval - Each verification stage requires manual review by designated admins - Higher security and control over the approval process - Suitable for high-risk or compliance-critical scenarios
2. Admin Approval Requirements
For manual approval workflows, you can configure:
- Number of Required Approvals: Specify how many admins must approve before a verification is fully approved (maximum 3)
- Admin Roles: Define which admin roles can approve specific types of verifications
- Approval Hierarchy: Set up approval chains if needed
3. Verification Requirements
- Required Verifications: Specify which verification types are mandatory for each group
- Optional Verifications: Define additional verifications that can be added as needed
- Verification Order: Set the sequence in which verifications should be completed
Use Cases
Customer Onboarding
Group together identity verification, address verification, and liveness check for new customer registration.
Compliance Checks
Combine AML checks, document verification, and background checks for regulatory compliance.
Employee Verification
Group employment verification, reference checks, and credential verification for new hires.
Loan Applications
Combine income verification, address verification, and identity checks for loan processing.
Admin Workflow: KYC/KYB Management
Once verification groups are configured, admins can manage customer verifications through the KYC (Know Your Customer) and KYB (Know Your Business) tabs in the dashboard.
Accessing Customer Verifications
- Navigate to KYC/KYB Tabs: Admins can access the KYC or KYB tabs in the dashboard
- View Organized Customers: Customers are organized by the verification groups they were onboarded with
- Status Overview: Each customer displays their current verification status
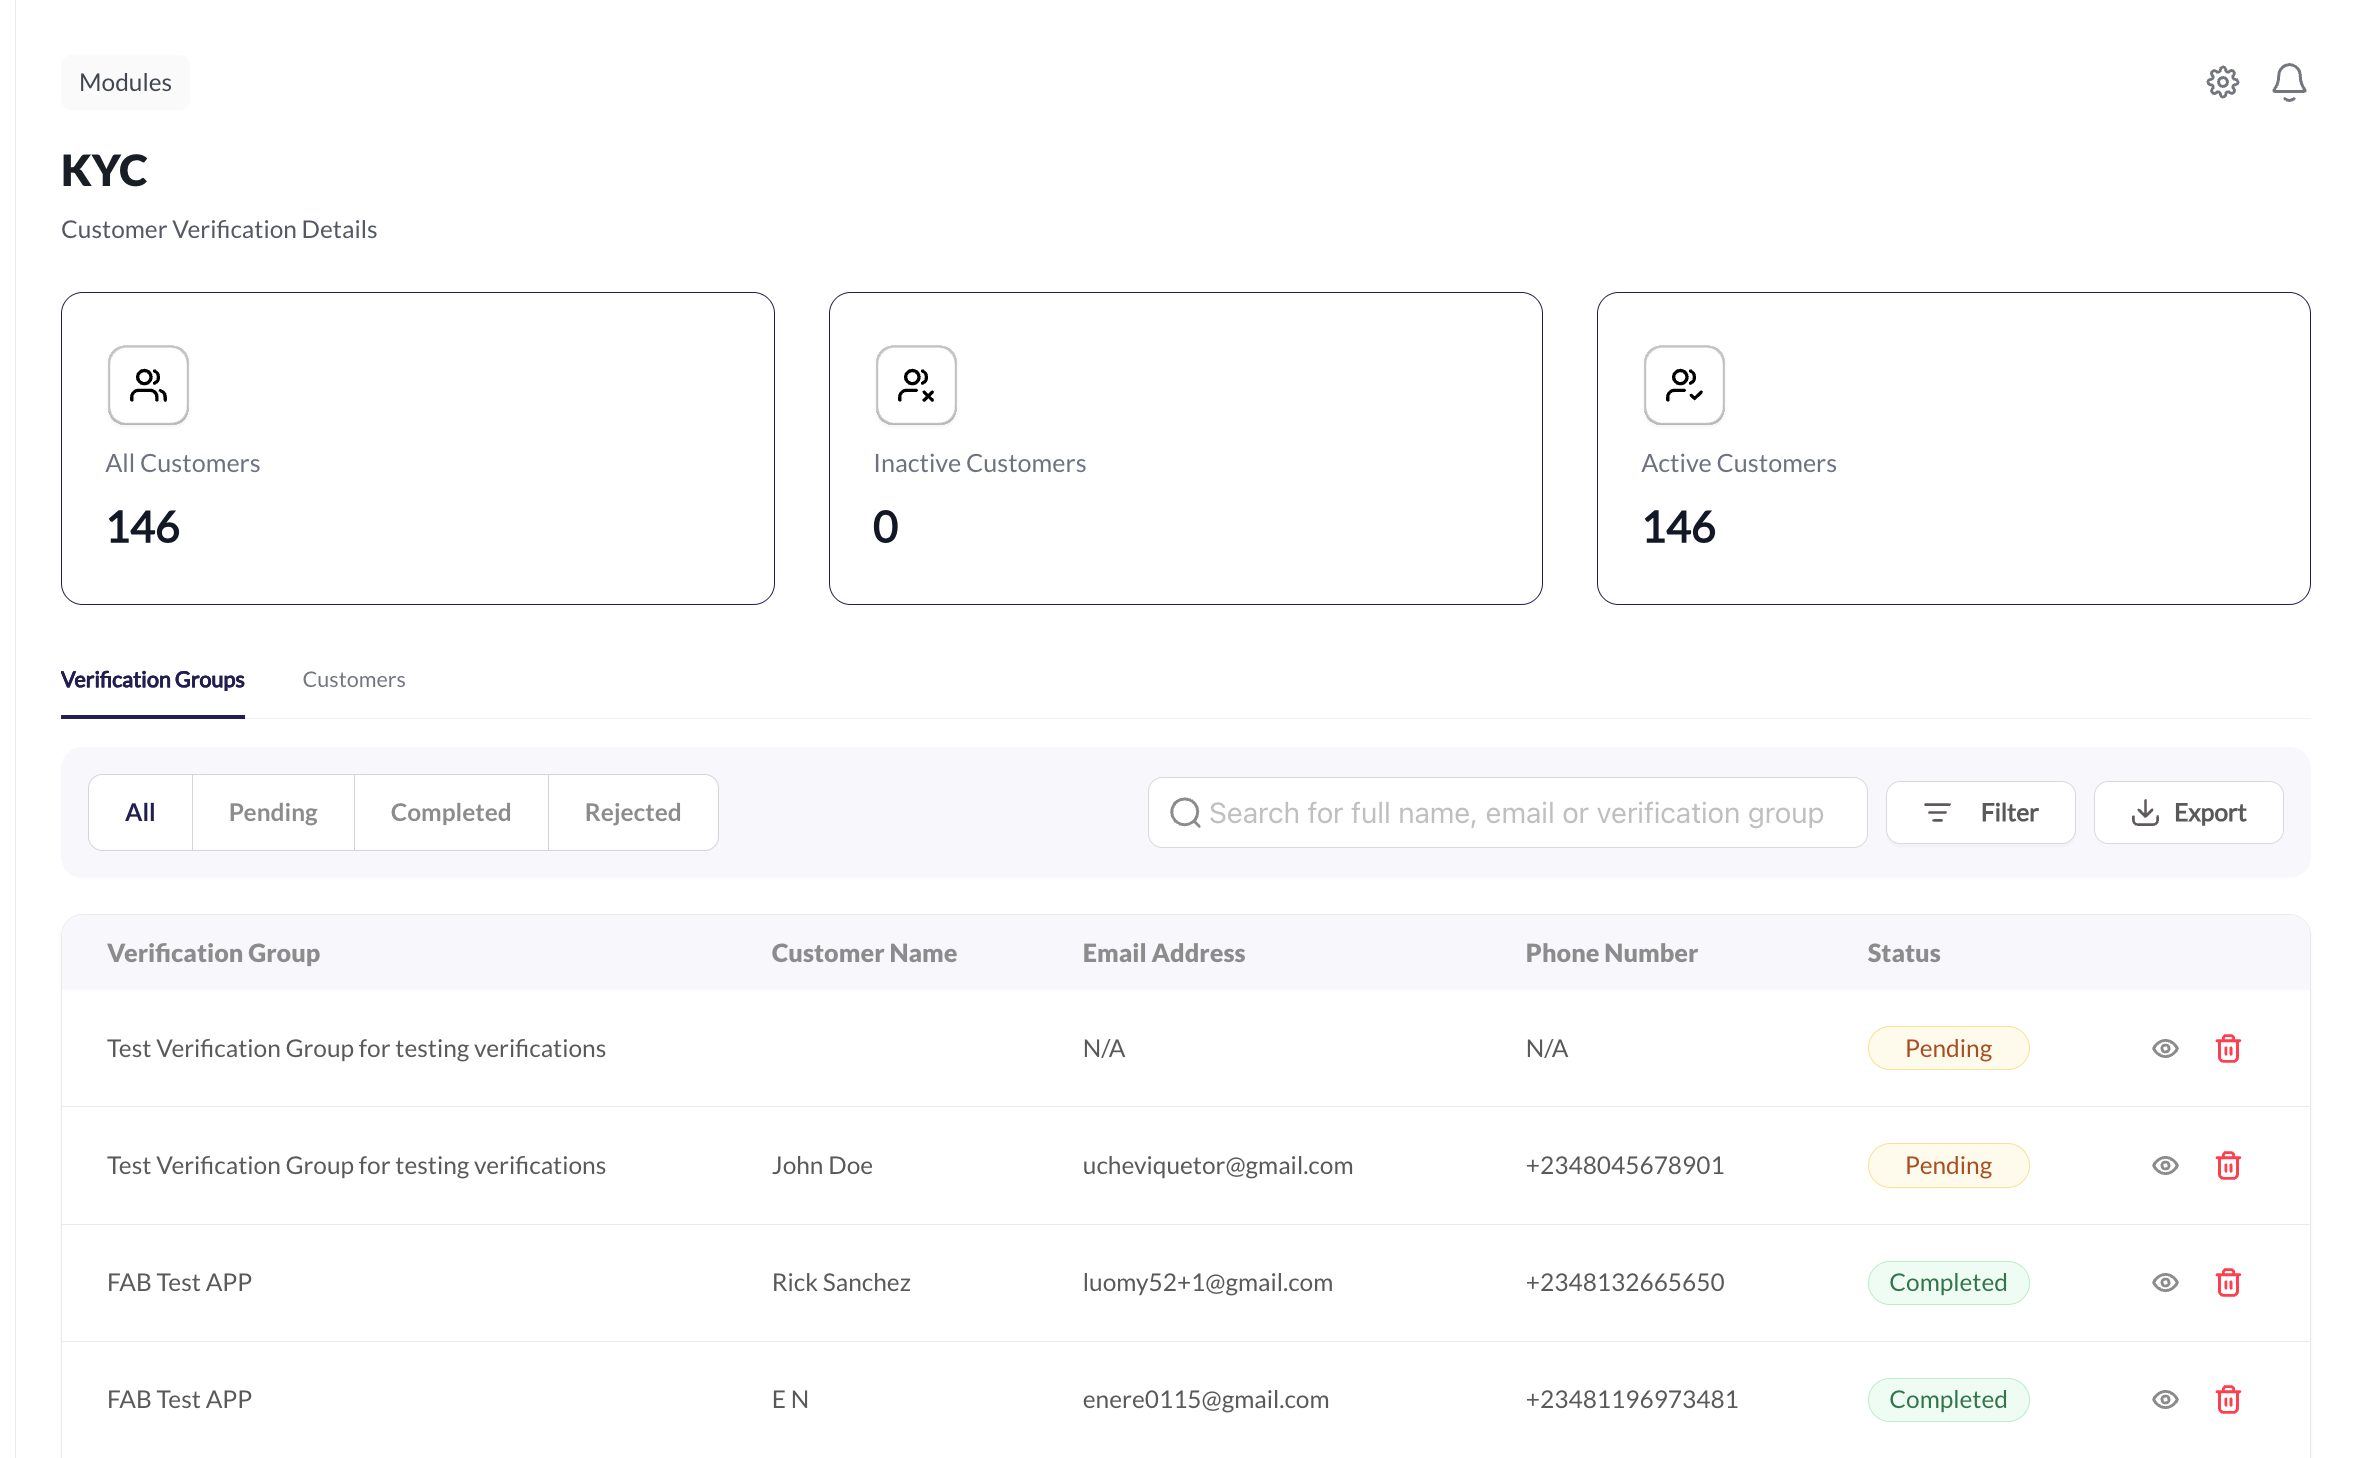
Understanding Status Indicators
The dashboard shows different status indicators based on the approval workflow configured:
Automated Verification Status
- Status: "Completed"
- Description: Verification was automatically approved by AI
- Action Required: None - verification is fully processed
Manual Verification Status
- Status: "Pending"
- Description: Verification requires manual admin review
- Action Required: Admin review needed
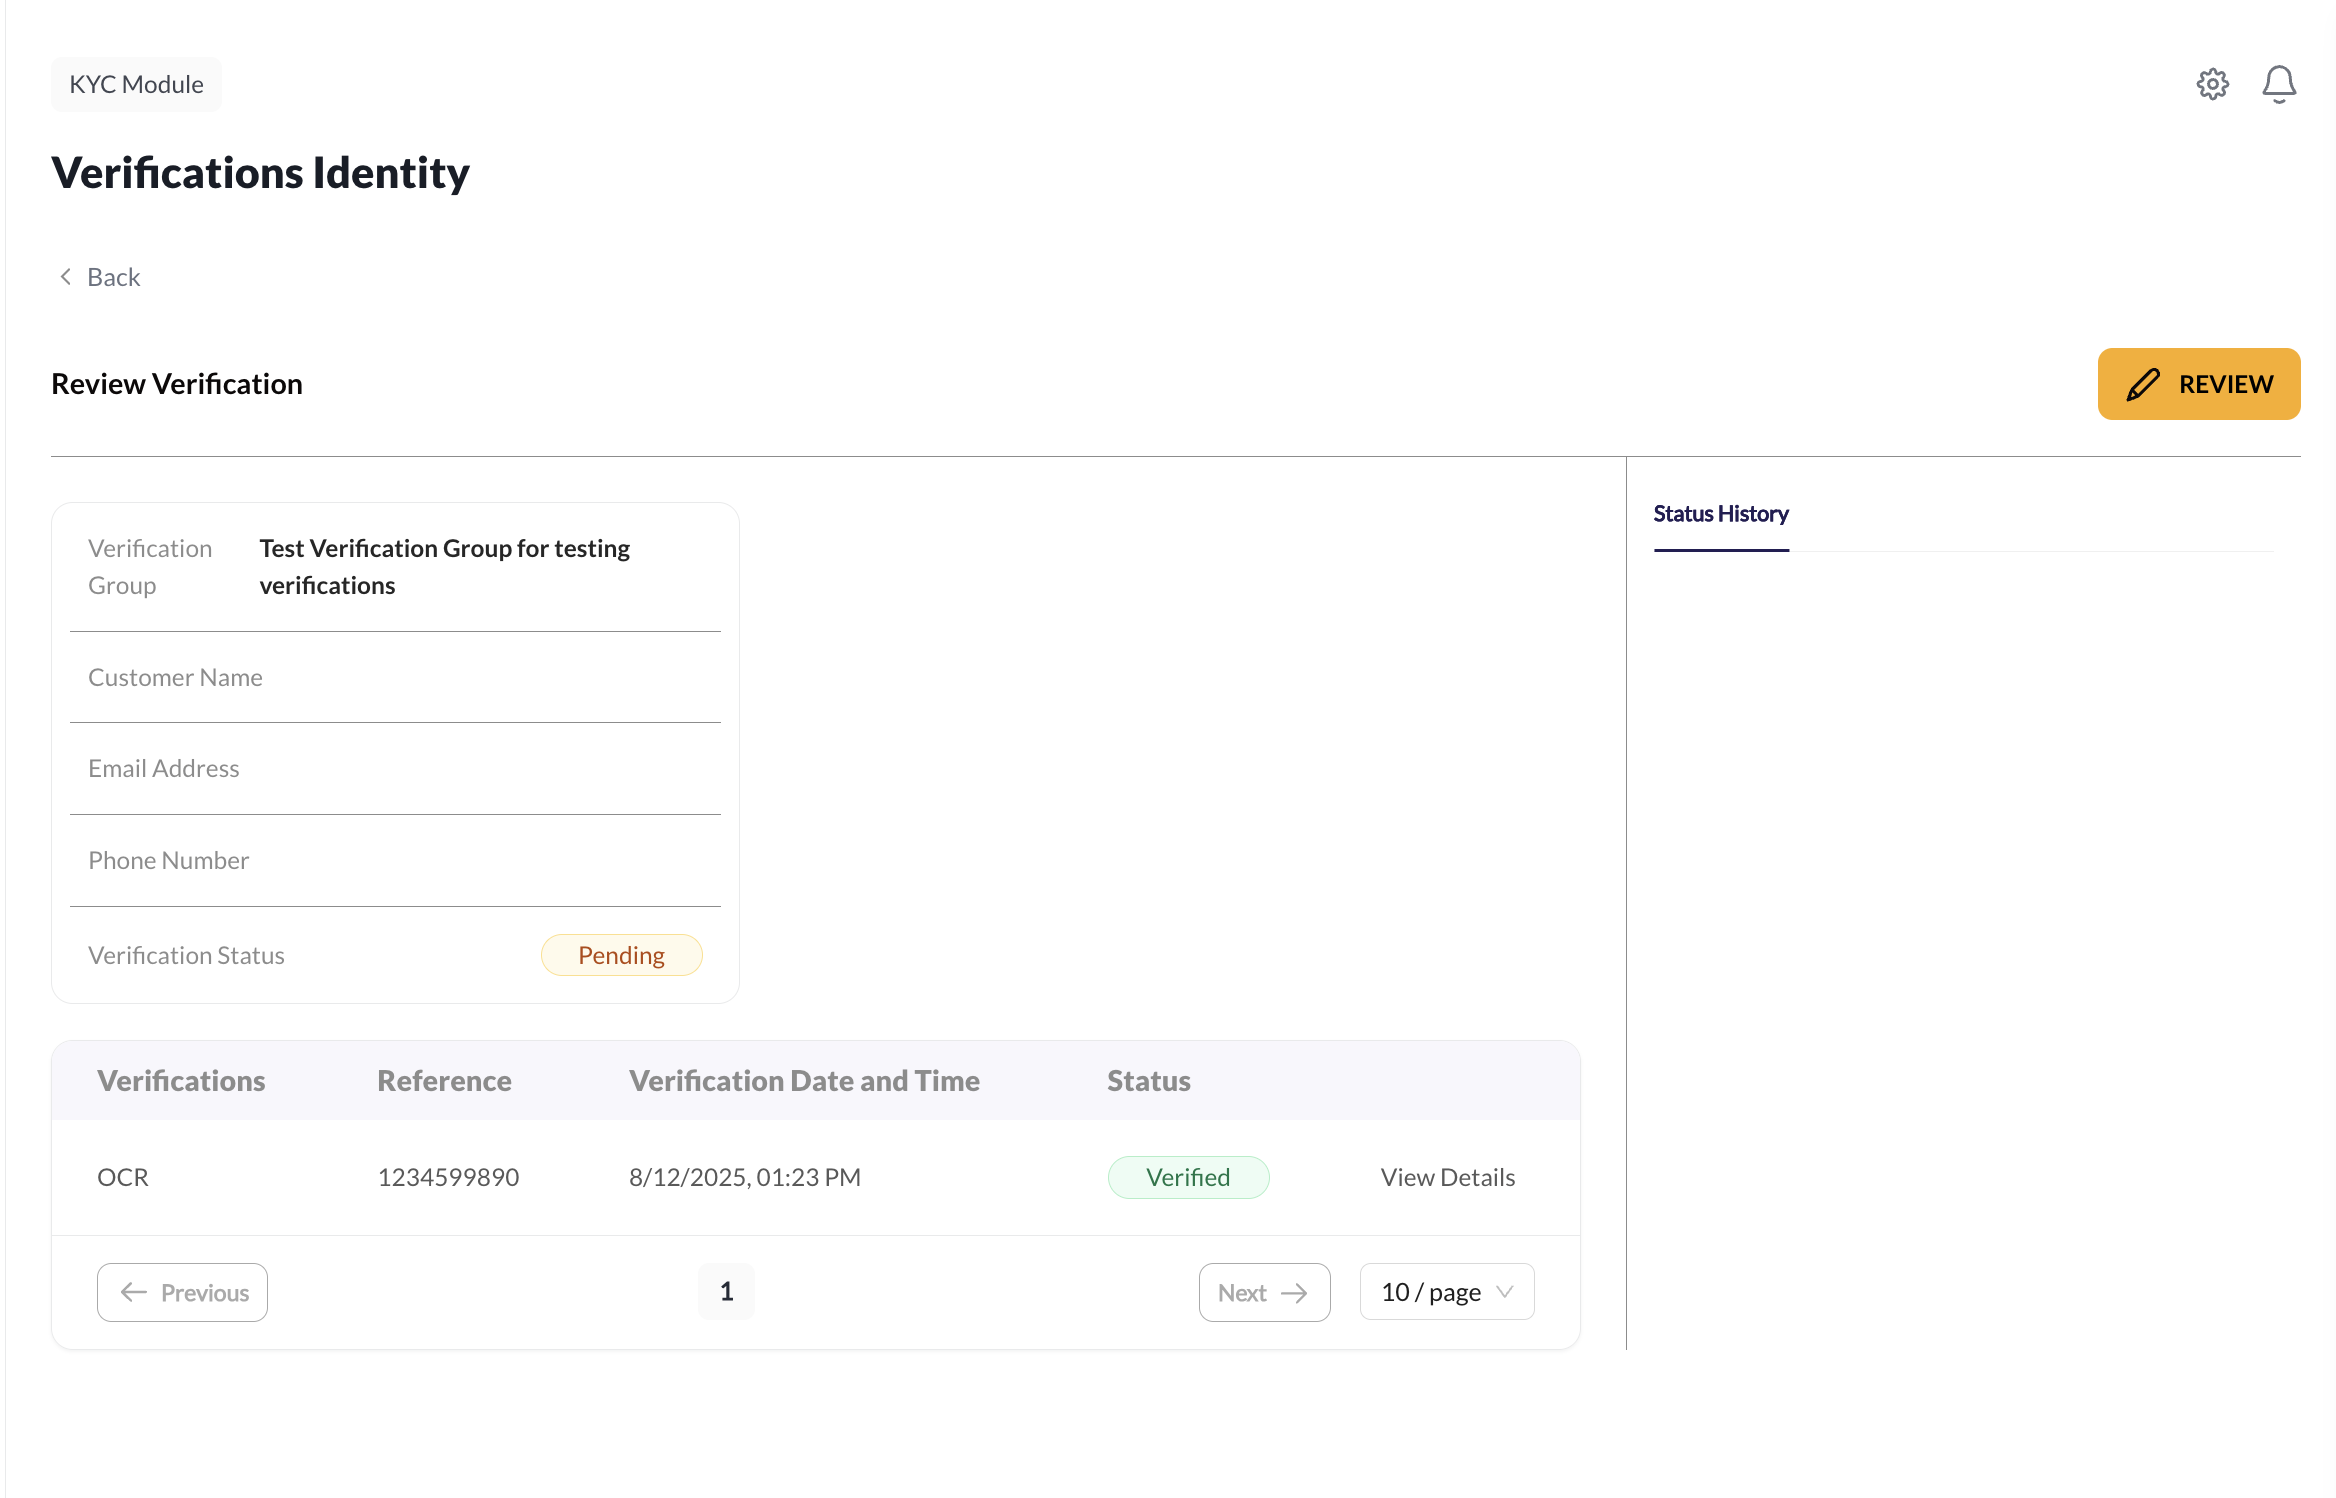
Reviewing Customer Verifications
View Verification Details
- Click Eye Icon: Click the eye icon next to any customer to view their verification details
- Verification Overview: See all verifications carried out for that customer
- Status History: View the complete status history showing reviews by other admins
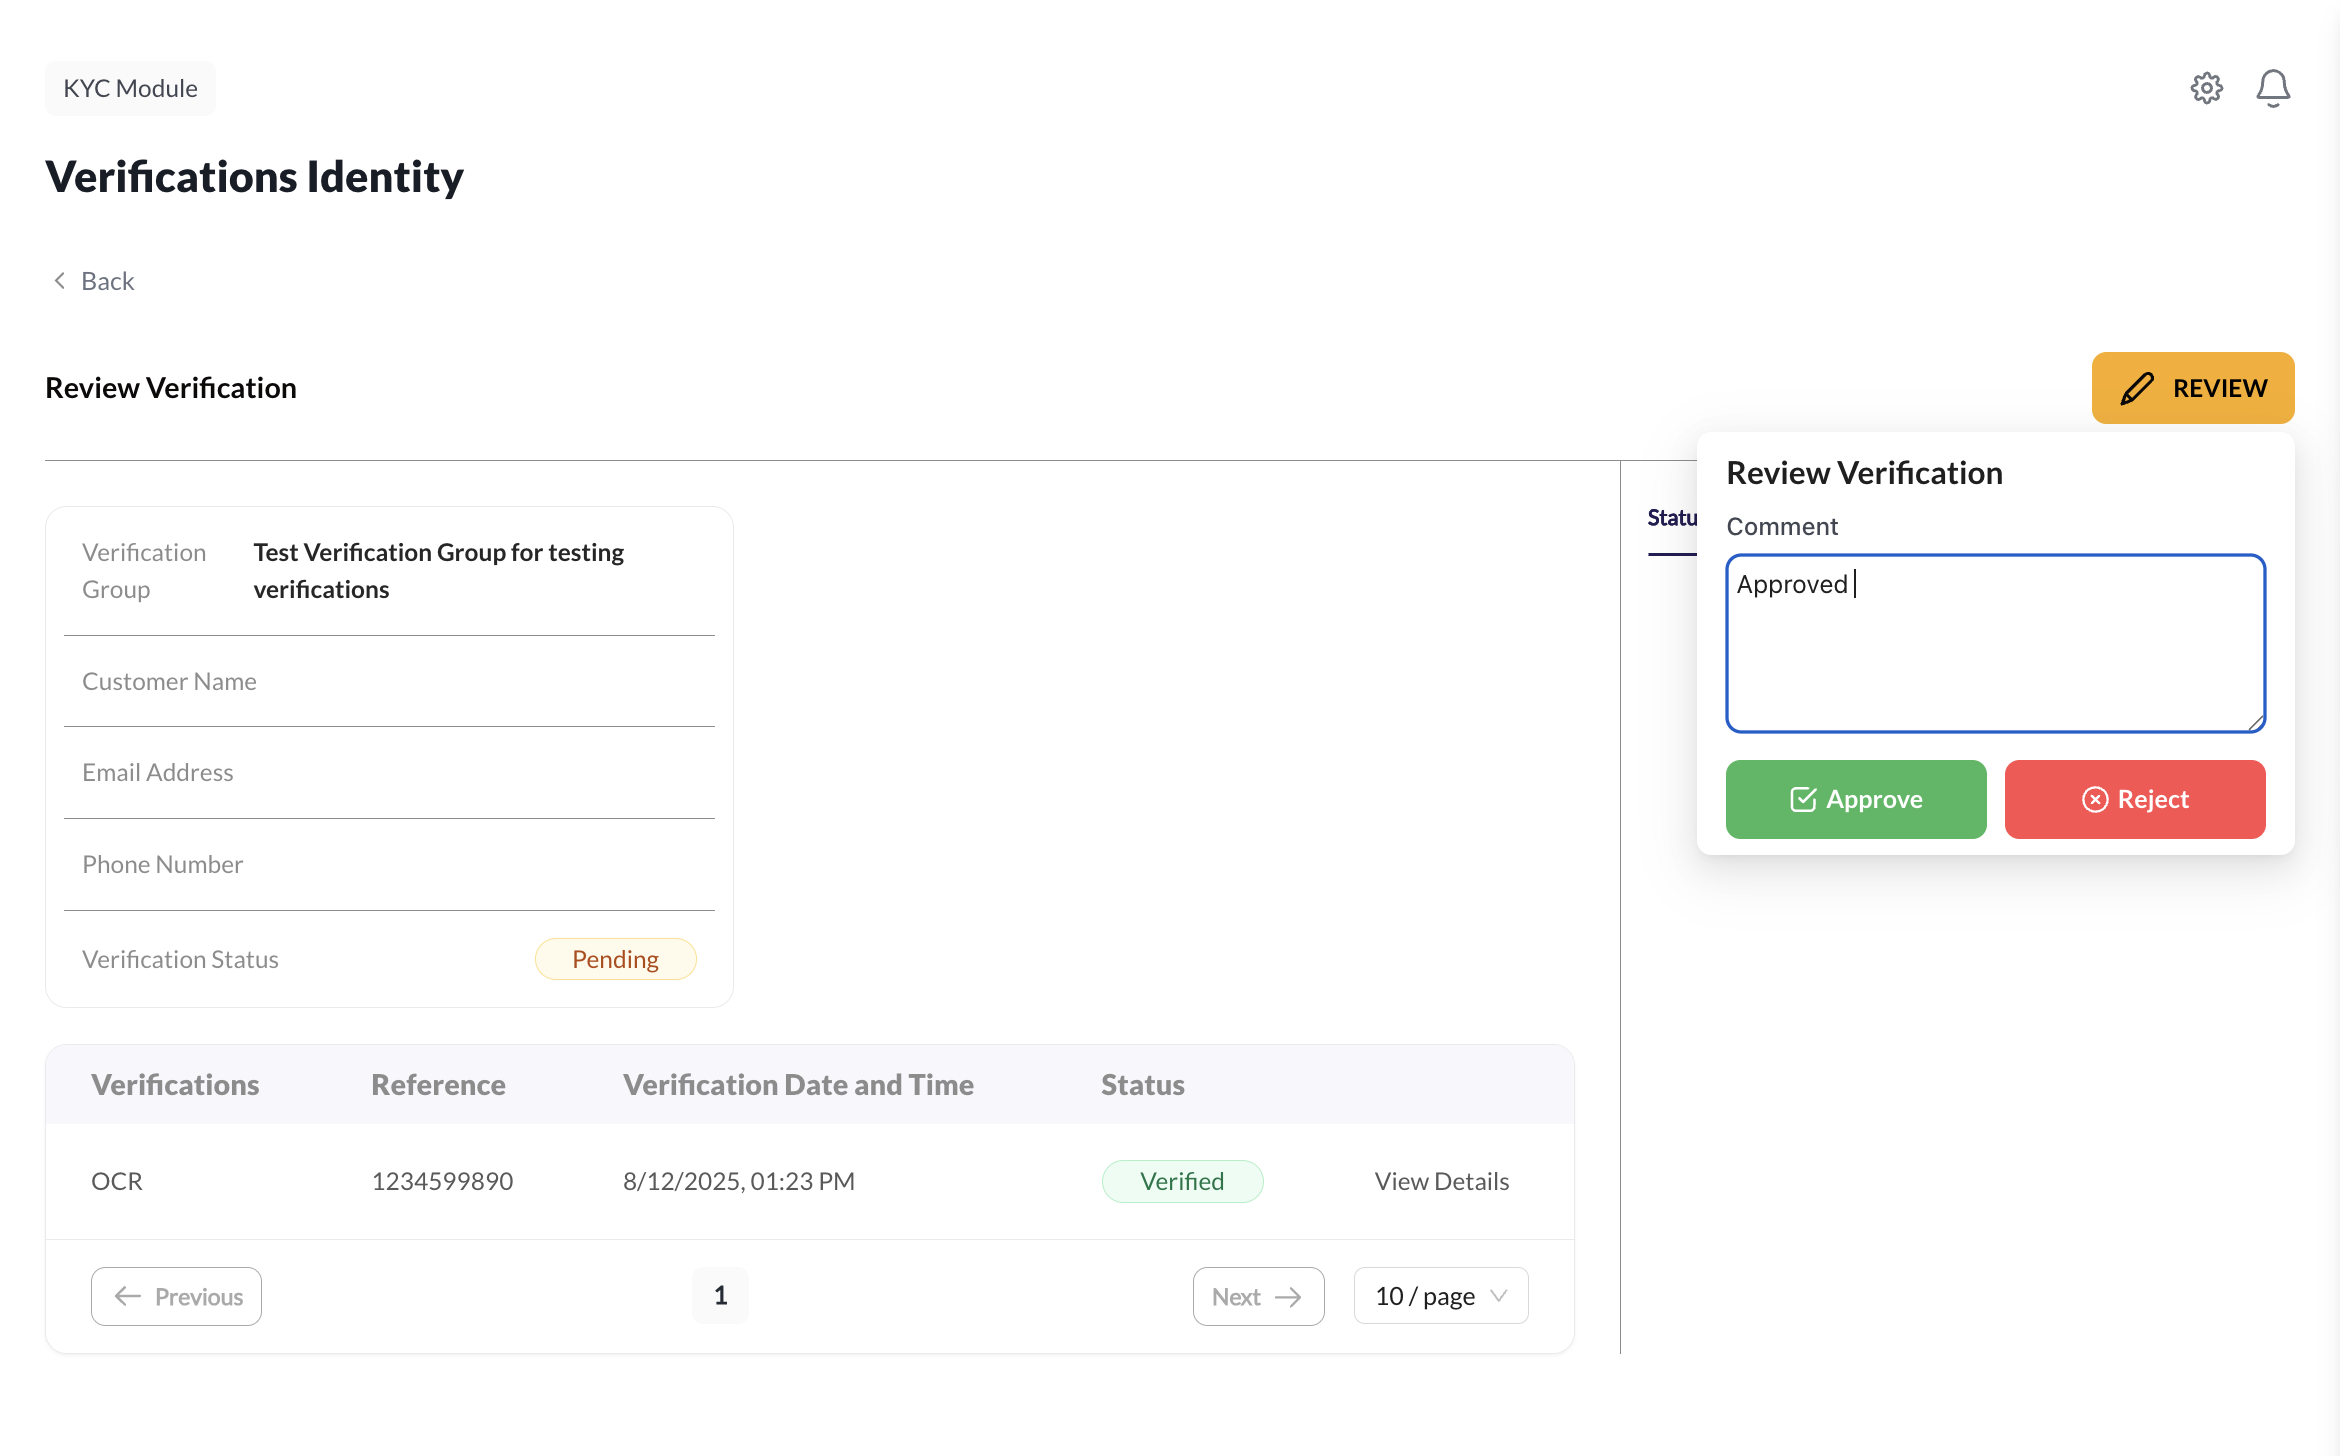
Adding Admin Reviews
- Access Review Section: Navigate to the review section within the verification details
- Provide Review: Add your own review and approval decision
- Status Update: The status history automatically updates with your review
- Completion Check: If enough admins have provided approval (based on configured approval count), the verification status changes to "Completed"
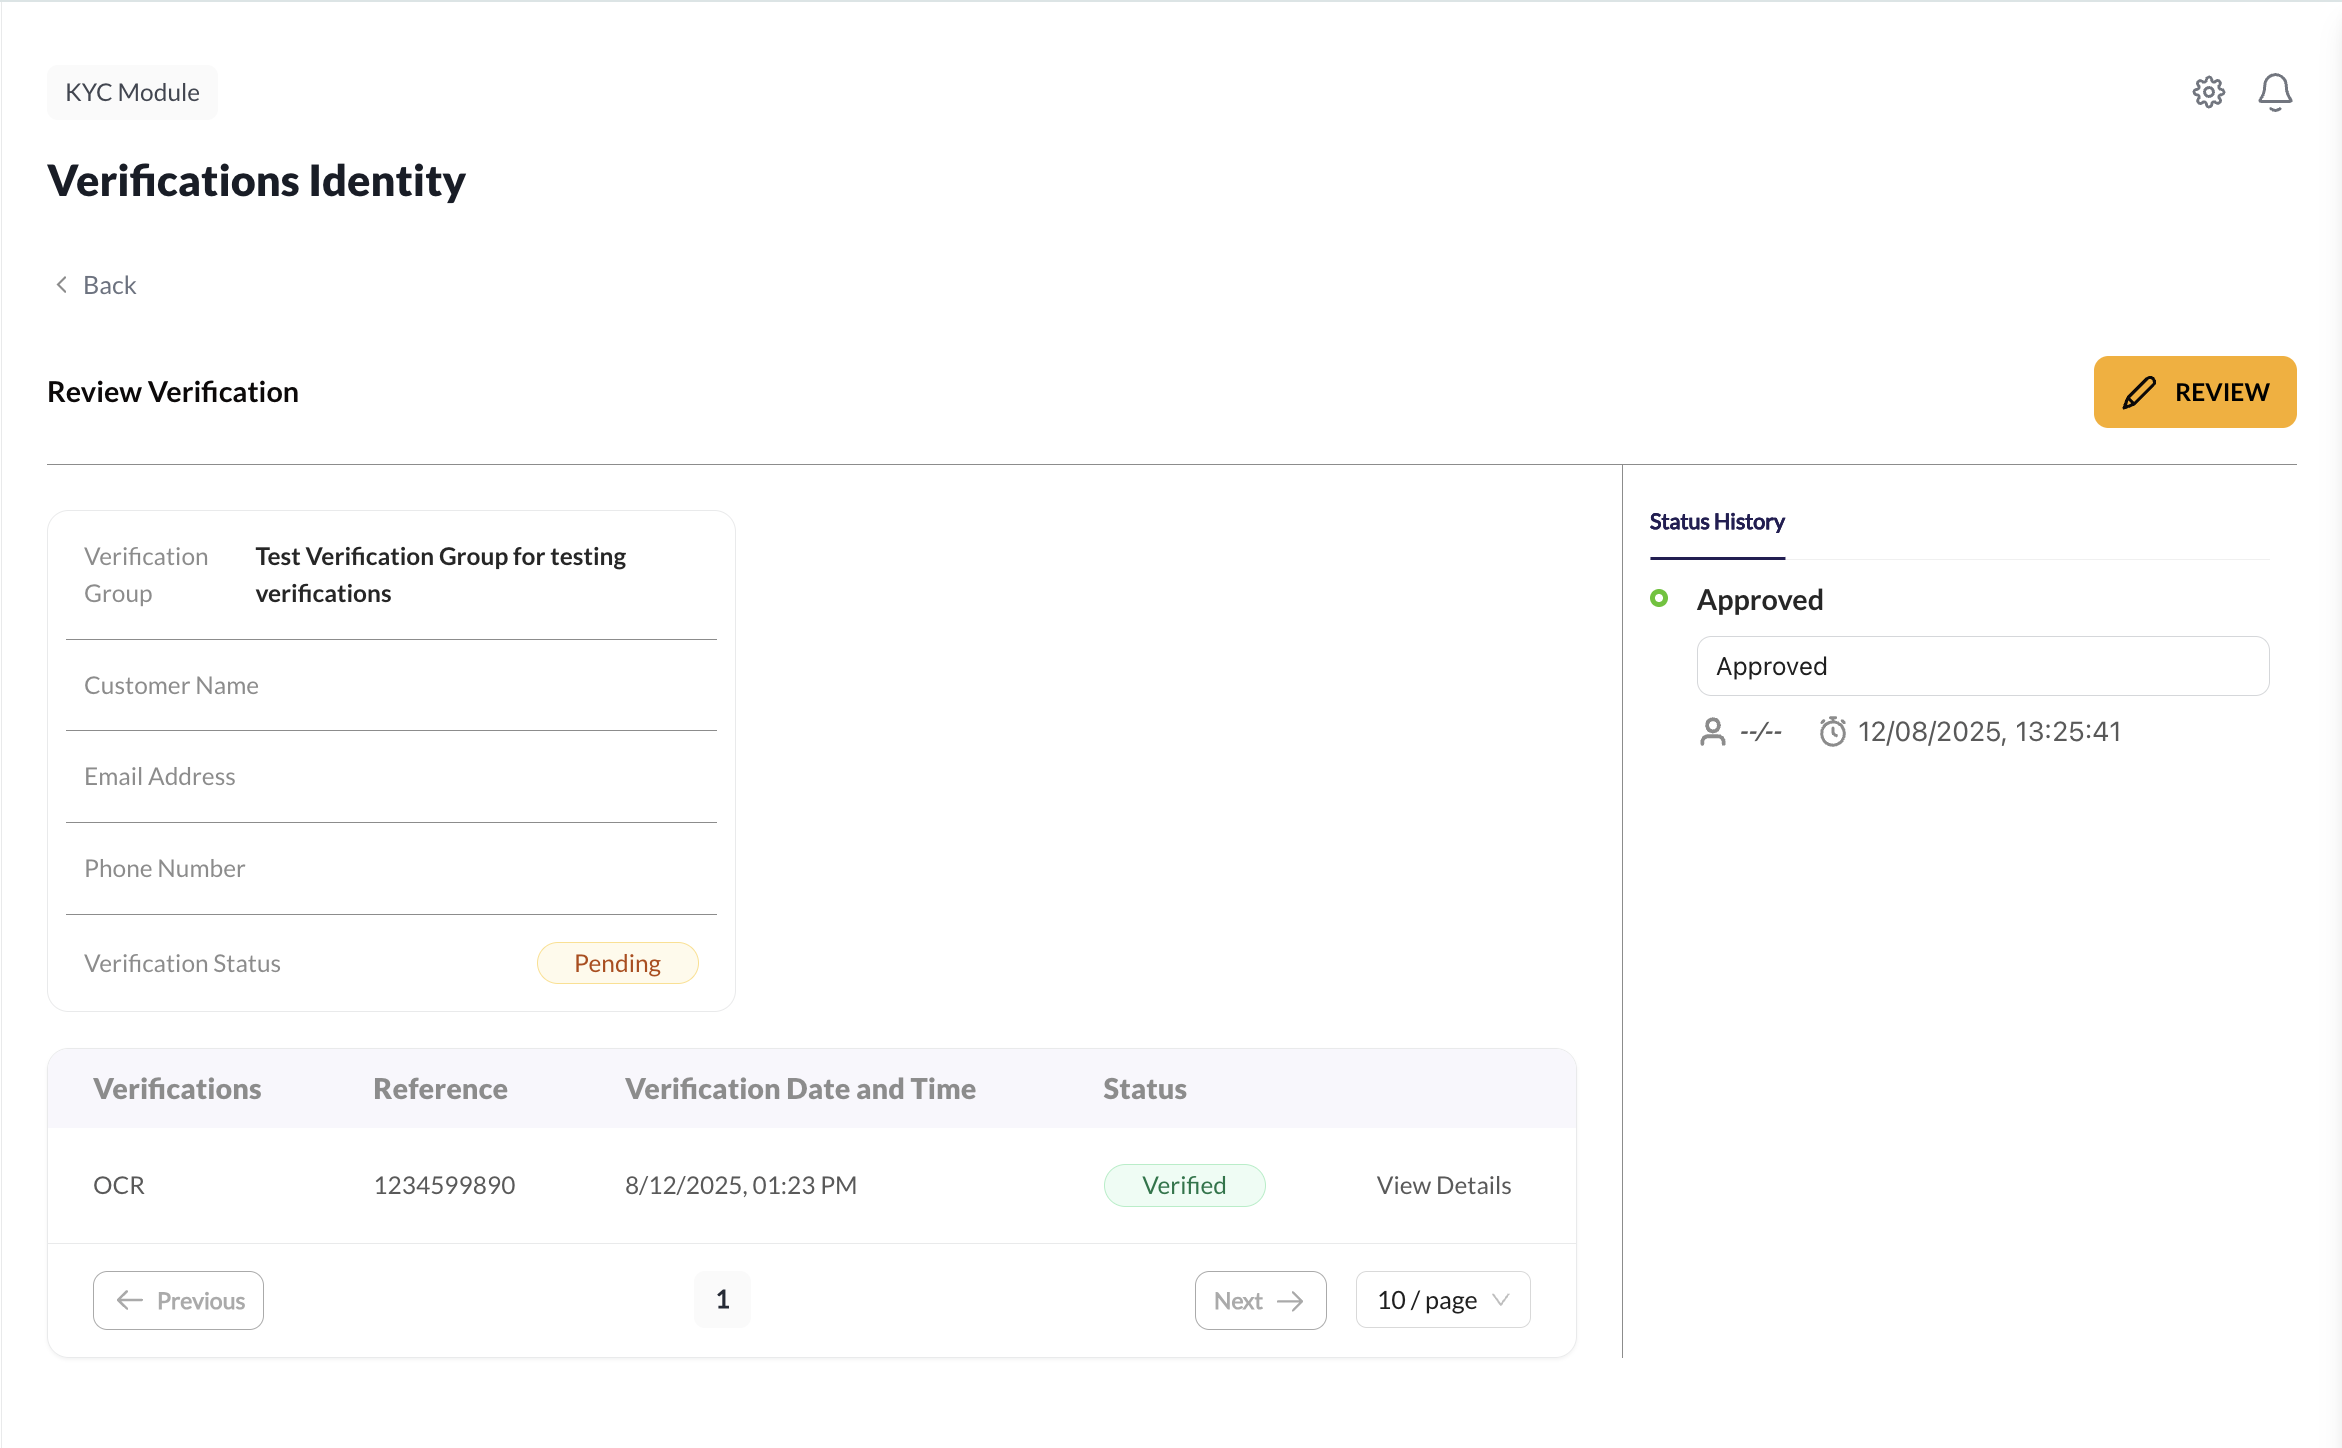
Status History Tracking
The status history provides a complete audit trail:
- Reviewer: Name of the admin who provided the review
- Timestamp: When the review was submitted
- Decision: Approval or rejection decision
- Comments: Any additional notes or comments from the reviewer
- Current Status: Overall verification status based on all reviews
Best Practices
- Plan Your Groups: Design verification groups based on your business processes and compliance requirements
- Set Appropriate Approval Levels: Balance security needs with operational efficiency
- Regular Review: Periodically review and update verification group configurations
- Document Workflows: Maintain clear documentation of your verification group setups
- Monitor Performance: Track approval times and success rates to optimize your workflows
Migration from Identities
If you were previously using the identities feature, verification groups provide a more flexible and powerful alternative:
- Better Organization: Group related verifications logically
- Enhanced Control: More granular control over approval processes
- Improved Tracking: Better visibility into verification progress
- Scalable Workflows: Easier to manage as your verification needs grow
Getting Started
To start using verification groups, contact your organization administrator to set up the initial configuration. Once configured, you can begin creating verification groups in your API requests using the verificationGroup parameter.